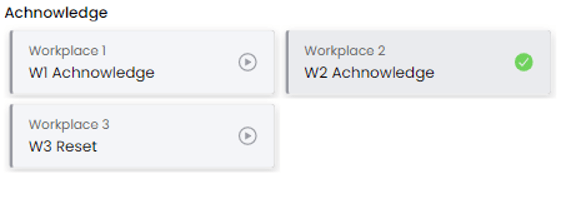
WeASSIST not only allows you to analyse the data of a tower in the cloud, but also to signal something at a tower from within the software. To do this easily and at the touch of a button, the switchboard widget is available. The prerequisite for using the switch panel widget is the configuration of switchable steps in the device configuration.
With the switch panel widget, you have two options for assigning a button. The first is limited to one action. This means that the same action is always carried out when the button is pressed. The second option is to store two actions that are carried out alternately. When the first button is pressed, the first action is executed, when the second button is pressed, the second action is executed, when the third button is pressed, the first action is executed again, and so on.
In this article we describe the second possibility. If you want to configure a button that only performs one action, simply omit the second action.
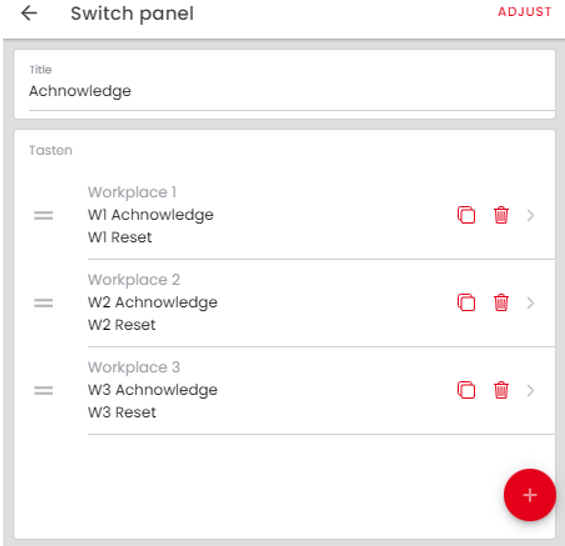
We start as with the other widgets with the position of the widget and then select the button panel widget in the widget selection. In the following dialogue you can name the widget and then place as many buttons as you like on the widget. To do this, simply click on the "+".
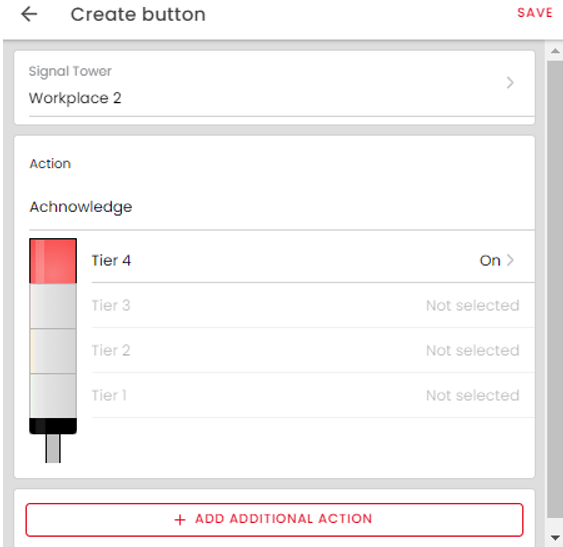
After you have clicked on the "+" to add a new button, you can select the signal tower that is to be controlled by the button. Afterwards you will get to the configuration of the action.
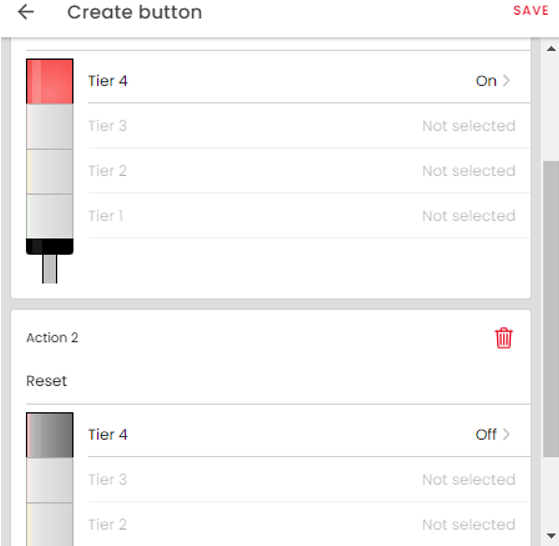
Here you can name the action and then select the state of the switchable steps that is to be transmitted as a switching command when a button is pressed.


To add the second action, click on "Add additional action" in the lower part of the dialogue and repeat the configuration. If you want a button that only performs one action, simply omit the configuration of the second action. As soon as you save the configuration, you have created your first button. To add more buttons to the same widget, click on "+" again and repeat the configuration. Once you have added all the buttons you need, save the widget.

